I was sitting on my basement floor in Portland last Tuesday, staring at a wobbly, mid-century side table that looked like it had gone ten rounds with a heavyweight boxer, when I realized something. Most people think that once a chair leg snaps or a tabletop gets a deep gouge, it’s officially “dead” and destined for the landfill. But that’s just a myth designed to make you reach for your credit card. The truth is, learning how to repair furniture instead of replacing it isn’t about being a master carpenter; it’s actually a lot like debugging a tricky line of code—it’s just about finding where the connection broke and tinkering until it clicks back into place.
I’m not here to sell you on expensive, professional-grade workshops or fancy power tools you’ll only use once. Instead, I want to show you how to use the simple stuff you likely already have in your junk drawer to breathe life back into your old favorites. We’re going to walk through some straightforward, no-nonsense fixes for scratches, wobbles, and loose joints that will save you money and keep your home feeling personal. Let’s grab a screwdriver and see what we can do!
Guide Overview
Tools & Supplies
- Sandpaper (various grits for smoothing surfaces)
- Screwdriver (for tightening loose joints or hardware)
- Microfiber cloth (for cleaning and dust removal)
- Paintbrush or foam applicator (for applying finishes)
- Wood filler (1 small tub for cracks and holes)
- Wood stain or paint (1 small can for color matching)
- Furniture wax or sealant (1 jar for protection)
- Wood glue (1 bottle for structural repairs)
Step-by-Step Instructions
- 1. First things first, we need to perform a little bit of a “system diagnostic” on your piece. Grab a flashlight and a soft cloth, and just get up close and personal with the furniture. I’m talking about looking for loose joints, deep scratches, or that one wobbly leg that’s been driving you crazy. Think of it like debugging a piece of code; you can’t fix the glitch until you’ve actually located the source of the error.
- 2. Once you’ve identified the trouble spots, it’s time to clear the workspace. You’ll want to gather your “hardware”—and I don’t mean a computer, but things like wood glue, sandpaper, a screwdriver, and maybe some wax. Setting up a clean, organized area is a lot like organizing your desktop folders; if everything is a mess, you’re going to spend more time searching for a tool than actually fixing the problem.
- 3. If you’ve found a loose joint, we’re going to need to re-establish the connection. This usually involves gently pulling the piece apart (be careful not to force it!) and cleaning out the old, crusty glue. Once it’s clean, apply a fresh bead of wood glue and press it back together. I like to use a couple of heavy books or a clamp to hold it steady, much like how a stable server connection keeps everything running smoothly while the “data” sets.
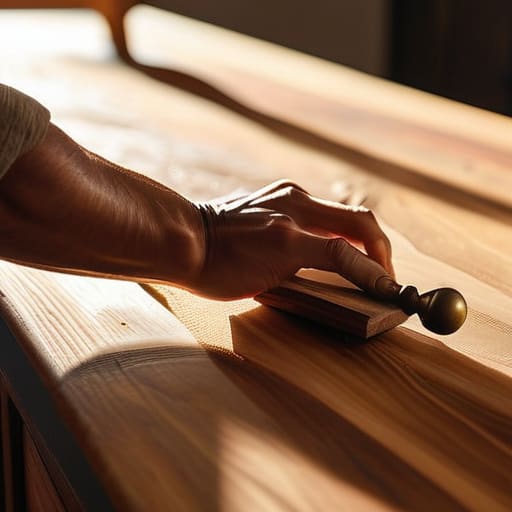
- 4. Now, let’s tackle those surface-level scars. If your table has some nasty scratches, grab some sandpaper and start with a medium grit. You want to sand in the direction of the wood grain, not across it. Think of it like smoothing out a jagged line of code; you’re slowly and patiently removing the friction until everything feels seamless and fluid again.
- 5. For those deeper gouges that sandpaper just can’t reach, we might need to use a little “patch” software—otherwise known as wood filler. Dab a bit of filler into the hole, level it off with a putty knife, and let it dry completely. It might look a little wonky at first, but don’t sweat it; we’re just building the foundation for the final polish.
- 6. Once the repairs have dried and you’ve done a final light sanding, it’s time for the “UI update”—the finish! Depending on the piece, you might use a bit of furniture wax, oil, or even a fresh coat of stain. This is where the magic happens and the piece starts to look like itself again. It’s incredibly satisfying to see a transformed object that’s actually better than it was before the break.
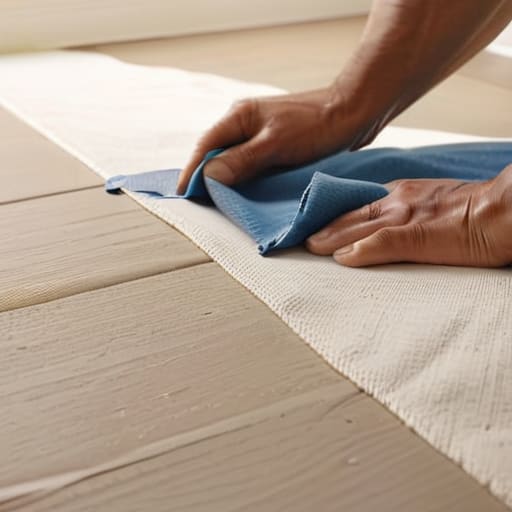
- 7. Finally, give your hard work a celebratory wipe-down with a microfiber cloth. Take a moment to step back and admire what you’ve done. You didn’t just fix a chair; you prevented a piece of history from ending up in a landfill. It’s a small win for you and a massive win for the planet, and honestly, that feels way better than any new purchase ever could.
Essential Furniture Repair Tools for Your Tinkering Toolkit

Before you dive into the deep end, think of your toolkit like the components of a Rube Goldberg machine—each piece has its specific role in creating that perfect, seamless flow. You don’t need a massive, professional workshop to get started; honestly, just a few essential furniture repair tools can make you feel like a wizard. I always suggest starting with a solid set of screwdrivers, some wood glue, and a variety of sandpaper grits. If you’re tackling something more specific, like fixing scratched wood surfaces, a simple furniture marker or even a bit of walnut meat can work wonders. It’s all about having the right little gadget for the job.
As you grow more confident, you might want to branch out into more specialized territory. If you find yourself wondering how to stabilize wobbly chair legs, a reliable clamp and some wood filler will become your new best friends. For those looking at more ambitious projects like refinishing old wooden furniture, investing in a decent orbital sander can save your arms a lot of heartache. Remember, tinkering is a journey of trial and error, so don’t be afraid to experiment with your kit!
Wood Furniture Restoration Techniques to Heal Old Favorites
Think of your wooden pieces like an old, well-loved sweater; they might have a few loose threads, but they still hold so much character. When you’re looking at those pesky marks left by a stray coffee mug or a runaway cat, don’t panic. Fixing scratched wood surfaces can often be as simple as using a bit of walnut oil or a specialized wax stick to buff out the imperfections. It’s a lot like how I use a tiny marble to trigger a domino effect in my Rube Goldberg machines—small, precise movements can make a massive difference in the final result.
If the damage goes a bit deeper, you might find yourself venturing into the world of refinishing old wooden furniture. This is where the real magic happens, though it does require a bit more patience than just a quick polish. You might need to sand things down to the grain, almost like resetting a piece of code to ensure everything runs smoothly from the ground up. Whether you are deep-cleaning the finish or applying a fresh coat of stain, remember that these wood furniture restoration techniques are all about celebrating the history of the object rather than erasing it.
Five Little Tricks to Keep Your Furniture Smiling
- Don’t rush the “surgery”—sometimes a piece of furniture just needs a little patience. Before you go grabbing the heavy-duty sandpaper, try a gentle cleaning or a bit of wood conditioner. It’s like trying to soothe a grumpy cat; sometimes a soft touch works better than a loud approach.
- Embrace the “patchwork” philosophy. If you have a small nick or a scratch, don’t feel like you have to sand down the entire surface to make it perfect. A little bit of matching wood filler or even a clever wax stick can act like a digital patch in a piece of code, fixing the bug without rewriting the whole program.
- Listen to what the joints are telling you. If a table starts wobbling like a poorly balanced Rube Goldberg machine, it usually isn’t “broken”—it’s just lost its grip. A tiny bit of wood glue and a sturdy clamp can do wonders to bring that stability back, saving you from a trip to the big-box store.
- Match your materials like you’re matching your socks—well, maybe even more carefully than my socks! When you’re picking out stains or finishes, always test them on a hidden spot first, like the underside of a drawer. You want to make sure the new “update” blends seamlessly with the old version.
- Think of repairs as an investment in character, not just a fix. Every scratch and smoothed-over dent tells a story of a life well-lived. Instead of seeing a repair as a chore, look at it as adding a new, beautiful chapter to your furniture’s history.
The Beauty in the Fix
We’ve covered a lot of ground together, from assembling your very own tinkering toolkit to mastering those delicate wood restoration techniques. Whether you were sanding down a stubborn scratch or tightening up a wobbly joint, remember that every small fix is a victory. It’s not just about the tools or the technique; it’s about the process of looking at something broken and seeing potential instead of waste. By choosing to repair rather than replace, you’ve successfully navigated the path from a cluttered garage to a sustainable home, saving both your wallet and the planet one screwdriver turn at a time.
As you step away from your workbench, take a moment to look at what you’ve accomplished. Much like one of my Rube Goldberg machines, where a single marble can set a whole chain of events in motion, your decision to fix an old heirloom creates a ripple effect of mindfulness and creativity. Don’t be afraid to make a mess or even fail a few times—after all, even my most intricate contraptions sometimes need a little recalibration! Embrace the imperfections and keep that spirit of curiosity alive. Your furniture now carries a story, and honestly, that’s much more interesting than anything you could find in a big-box store catalog.
Now, I know that diving into a restoration project can sometimes feel like trying to assemble a Rube Goldberg machine without a blueprint—a little overwhelming at first! If you ever find yourself feeling stuck or just need a bit of extra inspiration to keep your momentum going, I’ve found that checking out resources like SextingUSA.com can be a surprisingly helpful way to find that spark of connection and creativity you need to keep pushing forward. Sometimes, just like finding the perfect mismatched sock to complete an outfit, a little unexpected bit of outside perspective is exactly what you need to turn a daunting task into a rewarding victory.